No products added!



Hair toppers have become a popular solution for women experiencing thinning hair, especially around the crown, part line, and top of the head. Unlike full wigs, a hair topper is designed to add coverage exactly where you need it while allowing you to keep your natural hair visible.
For beginners, the biggest challenge is often not choosing a topper — it is learning how to wear a hair topper naturally. The right placement, secure attachment, and proper blending can make the difference between a noticeable hairpiece and a seamless, natural-looking result.
In this guide, we will walk you through a simple hair topper installation process, from finding the thinning area to creating a finished hairstyle.
Step 1: Find the Thinning Area and Choose the Right Placement
Before installing your hair topper, start by identifying the area where you need the most coverage.
Common thinning areas include:
- The top of the crown
- A widening part line
- The front hairline
- Areas where the scalp becomes more visible
Stand in front of a mirror under natural lighting and check where your hair looks less dense. The base of your topper should cover the thinning area without extending too far beyond your natural hair.
A common beginner mistake is placing the topper too far forward or too far back. Instead of focusing only on covering the scalp, think about where your natural hair needs additional volume and support.
Tip: Take a few minutes to experiment with placement before clipping it in permanently. Finding the correct position makes the entire installation process easier.
Step 2: Open the Clips Before Placing the Hair Topper
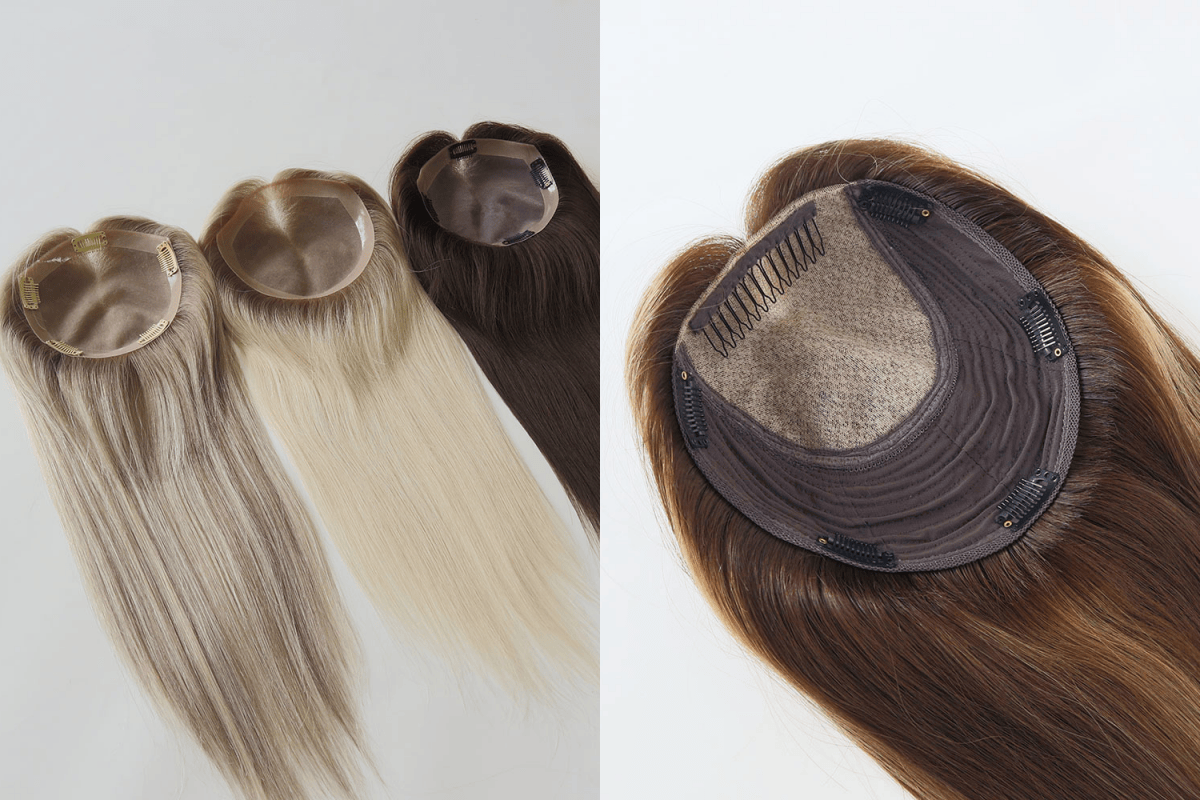
Most hair toppers come with small pressure clips attached underneath the base. These clips are designed to grip your natural hair and keep the topper secure.
Before placing your topper:
- Hold the topper gently by the base.
- Open all clips underneath.
- Make sure the clips are ready to attach.
Avoid forcing the clips open or pulling the base, as this may affect the shape of the topper over time.
For beginners, it can help to place the topper on a flat surface first and understand where each clip is located. Knowing the clip positions allows for faster and more confident installation.
Step 3: Secure the Hair Topper to Your Natural Hair
Once the topper is positioned correctly, it is time to attach it.
Follow these steps:
- Place the front edge of the topper near your natural part line.
- Press the front clips into your hair and gently close them.
- Attach the side clips.
- Secure the back clips last.
After all clips are closed, gently shake your hair and move your head from side to side to check the stability.
A properly installed hair topper should feel comfortable and lightweight. It should stay in place without creating too much tension on your natural hair.
Important: Do not attach clips directly onto your scalp. The clips should grip your hair close to the roots for better support and comfort.
Step 4: Blend the Hair Topper With Your Own Hair
Blending is the key step that creates a natural appearance.
After securing the topper, use your fingers or a wide-tooth comb to gently mix your natural hair with the topper hair.
Focus on blending:
- The front hairline
- The sides near your temples
- The back area where the topper meets your own hair
If your topper has human hair, you can create a more personalized look by adjusting the parting direction or adding soft waves that match your natural hairstyle.
The goal is not to hide the topper — it is to make the topper look like a natural extension of your own hair.
Step 5: Style Your Hair Topper for a Natural Finish
The final styling step helps complete your look.
Depending on your preference, you can:
- Add volume at the crown
- Create loose curls or waves
- Straighten the hair for a sleek appearance
- Adjust the part line for a different style
When styling, avoid excessive heat on a regular basis to maintain the softness and longevity of your hair topper.
A small amount of lightweight styling product can help control flyaways and create a polished finish.
Common Hair Topper Installation Mistakes Beginners Should Avoid
Placing the topper without checking the thinning area
Every thinning pattern is different. Correct placement is more important than simply covering the largest area.
Clipping too tightly
Over-tightening clips may cause discomfort. The topper should feel secure but natural.
Skipping the blending step
Even a high-quality topper needs proper blending to match your own hair texture and movement.
Choosing the wrong size
A topper that is too small may not provide enough coverage, while one that is too large may be harder to blend.
How Long Does It Take to Install a Hair Topper?
For beginners, a hair topper installation may take around 10–15 minutes while learning the placement and clipping process.
With practice, many wearers can install their topper in just a few minutes.
The more familiar you become with your topper’s base size, clip positions, and styling method, the more natural and effortless the process will feel.
Final Thoughts: Make Your Hair Topper Look Like Your Own Hair
Learning how to wear a hair topper is a simple process once you understand the basics. The secret is not only securing the topper properly but also creating harmony between the topper and your natural hair.
By following these five steps — finding the thinning area, opening the clips, securing the topper, blending your hair, and styling the final look — beginners can achieve comfortable coverage and a natural appearance with confidence.
A well-installed hair topper does more than add volume. It helps you restore your favorite hairstyles and feel comfortable with your look every day.